I recently had to set up Veeam replication for a client who needed a subset of their production environment virtual machines replicated to another site that would provide as their disaster recovery datacenter in the event that their building becomes inaccessible. As of Veeam version 6.5, the recommended method of testing replicated VMs at the DR site was as follows:
- Disable the Veeam replication job
- Create a snapshot of the replica in the DR site
- Change the port group of the replica VM to one that does not have any network connectivity outside of the vSwitch to prevent unwanted communication to the real world (i.e you don’t want your mail server sending emails out or a trading application making trades)
- Power on the VMs and begin testing
- Power off the VMs
- Revert back to the snapshot created in step #2
- Delete the snapshot created in step #2
- Re-enable the Veeam replication job
Fairly easy to do for a small set of virtual machines but as you get towards a larger amount of VMs to test, the more clicking is involved while working through the GUI.
As with all repetitive tasks, PowerCLI would be able significantly decrease the amount of time required by not requiring the manual clicking in the GUI. The following outlines the steps and the respective cmdlets:
1. Ensure that the replication job is not running and proceed by temporarily disable the job to ensure a replication does not begin while you are running the test.
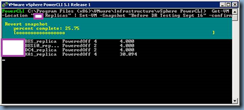
2. Next, create a snapshot of the replicas using the following PowerCLI command:
Get-VM -Location "<folderName>" -NoRecursion | New-Snapshot -Name "Before DR Testing Sept 16" -Confirm:$false
**Note that the cmdlet above assumes that you have placed all of the replicas you want to create a snapshot in a folder.
This will be used to revert the replica VMDK to its original state after the DR test being completed:
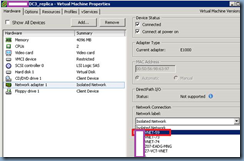
3. Next, we’ll need to change the port group to a network that is not routable to the production network to avoid conflicts between the replica and production virtual machine. Use the following PowerCLI command to change the port group from VNET-59 to Isolated Network:
Get-VM -Location “<foldername>” | Get-NetworkAdapter | Set-NetworkAdapter -NetworkName “Isolated Network” -Confirm:$false
You should now see the port group for the replicas has been changed:
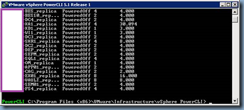
4. Power on the replica Virtual Machine with the following PowerCLI command and validate the integrity of the data and functionality of the server:
Get-VM -Location "<foldername>" | Start-VM
5. Once testing has been completed, power off the replica Virtual Machine with the following PowerCLI command:
Get-VM -Location "<foldername>" | Stop-VM -confirm:$false
**Note that you can actually skip this cmdlet to power off the VMs because running the next cmdlet that reverts to the snapshot that was created would automatically power off the VM.
6. With the virtual machines powered off, continue and revert the replica Virtual Machine to the snapshot you have taken in the beginning with the following PowerCLI command:
Get-VM -Location "<foldername>" | Set-VM -Snapshot "Before DR Testing Sept 16" -confirm:$false
**Note that there is no need to revert the port group for the Virtual Machine back to the original network because reverting to the snapshot created earlier would reverse the changes made to the port group.
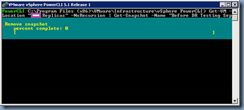
7. Delete the snapshot that was created with the following command:
Get-VM -Location "<foldername>" -NoRecursion | Get-Snapshot -Name "Before DR Testing Sept 16" | Remove-Snapshot -Confirm:$false
These cmdlets saved me a lot of mouse clicks during the setup and cleanup of a DR test.


No comments:
Post a Comment